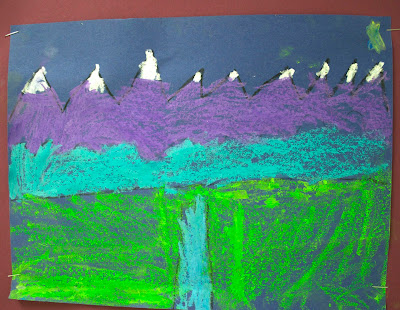
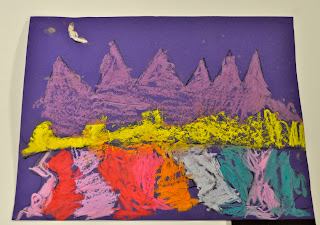
 Well I know I mentioned in this post, that I was wondering about the relevance of centering an entire project around one single 'element' of art, and I have come to the conclusion, that it is most definitely okay to do that with kindergarteners. They get super excited about simple things....oohing...and aaaahing...about using a black crayon, if you pitch it to them with the right sparkle in your voice.
With this project, I am able to take a simple line drawing and encourage students to create a beautiful work of art. Now, I admit, I sort of stole this idea from School Arts magazine, and made it my own.
Landscapes are such a simple concept for art lovers...but for 5-year-olds, I've figured out that I actually have to teach them what a landscape is. Since it is a pretty easy concept, I use this lesson to implement procedures that I will use all year. This is a very successful lesson, that I have taught nearly 100 times (have I mentioned that I have 11 classes of kindergarten and 2 classes of first grade...often I will do this 13 times in one week!)
Below, I will outline my procedures for putting on a paint shirt, using the drying rack, washing hands in the water bucket, and what to do for 'free time' for those that finish early.
To begin the lesson, I show students how to put on paint shirts for the first time. In my classroom, I have a laundry basket full of old janitors shirts, the kind the button up the front. I demonstrate (with a student model) how to put it on backwards, and have a friend put a clothespin on the back, not too high or else it could choke them, and not too low, because they could sit on it!
After observing how to put on the paint shirt, we quickly play a game! I have students play the line game to review the lines that were learned and practiced the week before. To see more about this game, read here.
Line Landscape:
1. Say: Today we will be using chalk to create a beautiful landscape. Say that with me: Landscape! Again: Landscape. Not LAMBScape, LANDSCAPE!
2. A landscape is an 'outside scene', I explain as I point to a couple of magazine photos hanging on the board. I point out how there is a horizon line, with purple mountains meeting the sky, and there are beautiful purple flowers, a lake reflecting the sky and that the photo was probably taken in the early morning. I also point out a few other details from other landscapes, found in magazines.
3. Today, we will be using 3 simple lines to make our landscape. A zigzag, a wavy and a straight line. I draw these on the board as I say each one. Then I have students draw each line in the air with their finger.
4. Students get to choose between purple and blue paper. I say, I'm choosing purple because I want mine to be an early morning picture, just like the mountain landscape I showed them. Step One is to use a black crayon to draw a zigzag line. 'What do you think the zig zag line is for?', I ask. 'Mountains!' the class replies. 'Yes, mountains,' I say as I draw the foothills and the straight line at the bottom. Then I add a moon or a sun, clouds and a little stream or road curving from the bottom edge towards the middle.
5. To finish the landscape, we will be using chalk pastels. 'Raise your hand if you have used sidewalk chalk'...'then you know how dusty chalk can be! Well, chalk dust can be very messy and it can stir up kid's allergies, so I put my chalk in a tray with a little bit of water. It is still sort of messy, and cold, and wet, but it keeps the dust from floating up in the air and making kids cough!'
 |
| My Demo...I do one in front of every class. |
7. Procedure for Drying Rack: When students are finished, they will put their landscape in the drying rack. Usually, this is the first time they have used the drying rack, so I model where it is and explain that they must 'ALWAYS, ALWAYS START AT THE BOTTOM', I have them chant that with me a few times.
8. Procedure for Water Bucket: 'Once your painting is in the drying rack, you will need to wash your fingers. Over here, we have the water buckets. (I don't let my kinders use the sink, see why here). I have a GIRLS water bucket and a BOYS water bucket. There are two sponges in each bucket.....That means two girls can wash their hands at the same time...and two boys can wash their hands at the same time! If there are already two girls in the bucket, you must wait in line behind them being careful not to touch anyone or anything with your messy fingers while you wait.
9. I point out how to get a paper towel and wash hands, and where the trash cans are. 'Only after your paper is in the drying rack, and your hands are clean should you take off your paint shirt!'
10. If someone finishes early, they might have a chance to color a paper to take home today. Somewhere in the room, I have a copy of the 'Starry Night' by Vincent Van Gogh. I have students try to find it...then I show that they can color a 'coloring sheet' copy of it with crayons. Students should not use the chalk to color it, I put the copies near crayon baskets, that they can get for their table.

12. After demonstrating everything, and modeling the procedures, I am ready to distribute materials. I have 3 tables start putting on paint shirts (without my help, I've just modeled it for them, I let them try it alone.) The other three tables stay where they are as I go around and let them choose between purple and blue paper. I distribute the black crayons and then assist with putting on paint shirts, while at the same time, I'm constantly saying things like: "When you make your zig zag line, make sure it goes from one side to the other!' and "Draw three lines, zig zag, wavy and straight...then add your other details." As the paint-shirt students start sitting down, I begin giving them their papers and letting the ones who have been drawing get up to put on their paint shirts.
13. As soon as everyone has their paint shirts on, and are finished drawing, I remind them to PUT THEIR NAMES ON THE BACK. I check each table for names, before I hand them their tray of chalk. Then I say, 'Everyone say this with me: ew, sick disgusting!' Now they have all said 'ew, sick, disgusting about the wet chalk, they are not allowed to say those words again!
 |
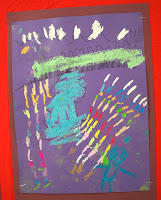
| Not a 'landscape'....but it is a cool line design! |

14. I monitor as students work....pointing out that they don't have to color the sky, because the sky can be left the color of the paper....but they do have to color everything else. Biggie: STUDENTS MUST COLOR ALL THE WAY FROM THE ZIG ZAG TO THE WAVY LINE. Otherwise, they will leave a big patch uncolored, and the zigzag line area doesn't look like mountains.
 |
| Sometimes I use 'non' examples to encourage kids to follow directions. But, often, those are my favorites |
16. When students line up at the end, I use that time to point out Vincent's painting (usually above my door) and I have them point to their own copy: the moon, the cypress tree, the church, the swirling night sky.
Thanks for reading!!


Dear Nellie Mae,
ReplyDeleteThanks so much for the detailed tutorial. I struggle with teaching kinders as I have only had to do it for 2 years. We only have 30 minutes for them and it seems so difficult to get through a project in that amount of time. Your suggestions are going to help me so much and I really appreciate it.
:)Pat