Showing posts with label 4th. Show all posts

Tuesday, December 20, 2011

Clay Owls

White clay is colored with construction paper crayons
In the fall, I went to a state convention and saw the most amazing idea for finishing a bisque-fired clay project. The teacher had the students color on their clay with construction paper crayons, and then paint the whole surface with black tempera paint (creating a wax-resist on clay), wiping the paint off so that it just fills in the crevices, leaving the colored areas bright with lots of contrast. I knew it would be perfect for a clay owl project that I do every few years.

I am always looking for single-fired clay projects since I do not have a kiln at my school. When I do clay, I have to pack up all of the (hundreds!) of little clay sculptures, while they are leather hard and haul them to another school, where my mentor fires them and unloads them in and out of the kiln. While I love the look of glaze, it adds several more trips and firings to the whole process. It is a lot of work for me. This also allowed the students to take the project home a whole lot sooner since they were not waiting for it to be glaze fired.

Note: coloring on the clay really chews up your construction paper crayons, so be sure to order plenty if you are doing it with hundreds of kids. ;-)
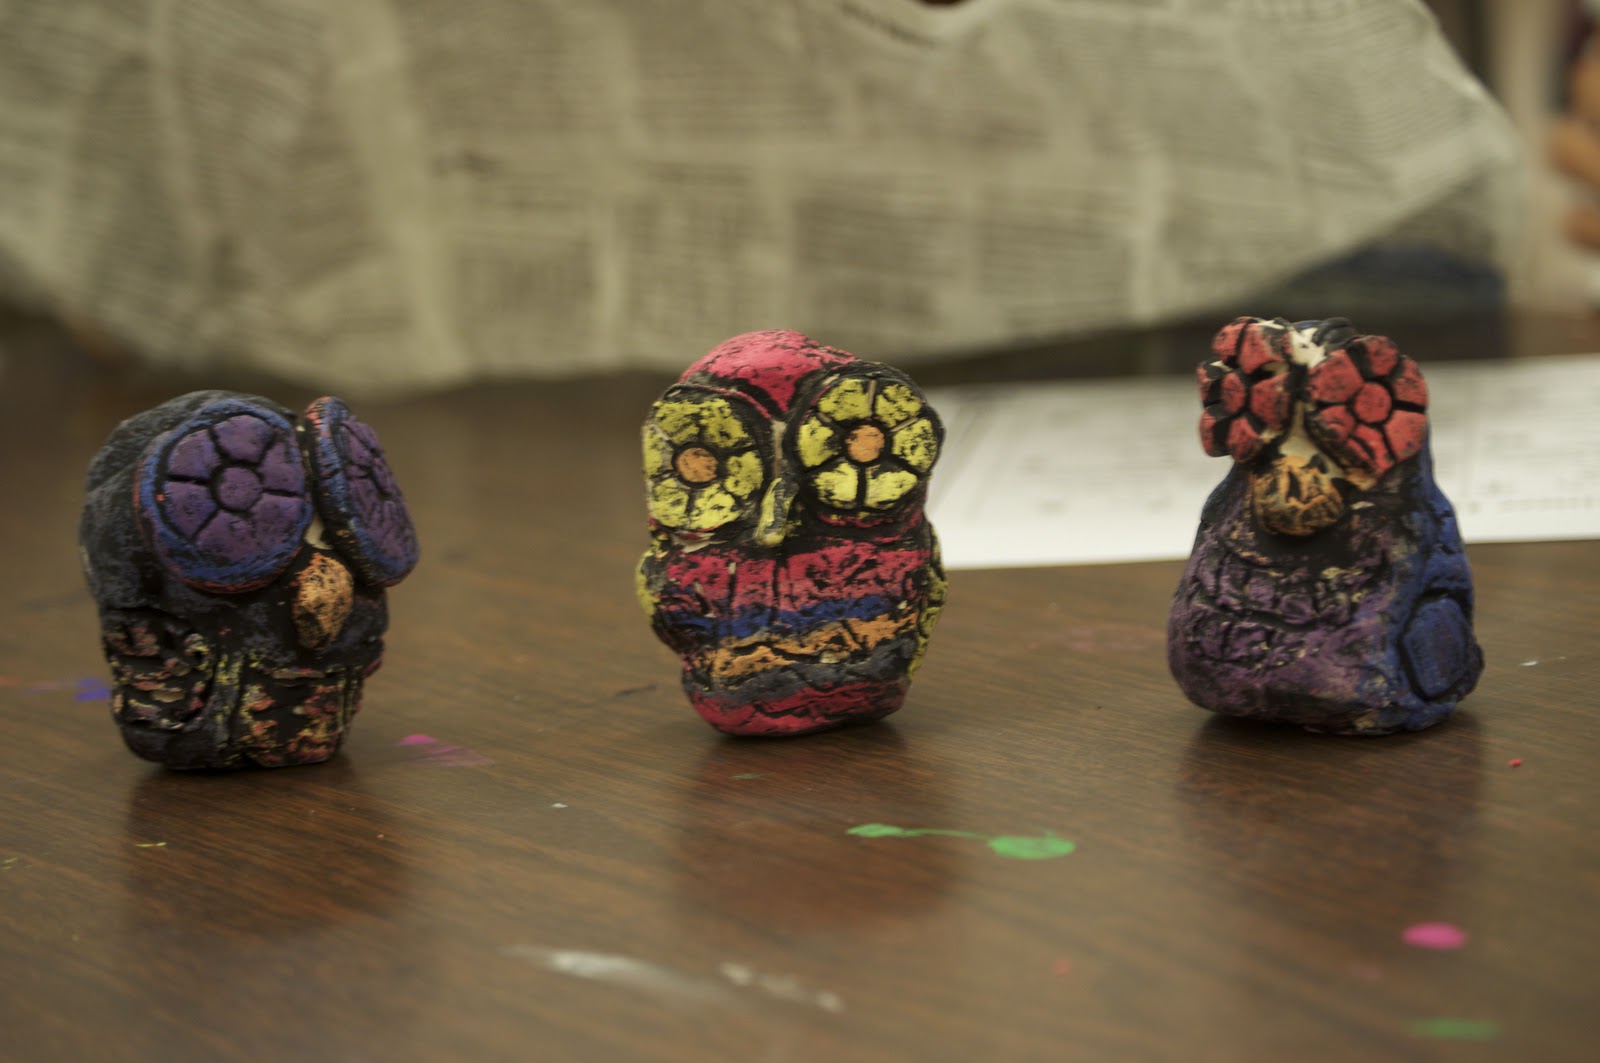
Materials: white earthenware (bisque fired)
construction paper crayons
tempera paint
After coloring with crayons, students paint over the surface with black paint. It creates amazing contrast with the color!

A Harry Potter owl!


To get those cool eyes, we used repurposed spools of thread to stamp the clay.


I did this project with 2nd, 3rd and 4th grade. The results were stunning. I really did not want to send them home!!

Monday, October 3, 2011

Large Painting With Words


After making a couple of large paintings with words on canvases, I became inspired to do something similar with my students. One of my paintings hangs in my living room, the other is in my classroom. Above, you can see that I added melted crayons to the top...it looks so cool in my classroom!

The week before we painted, I encouraged students to grab a packet of songs I had made with lyrics copied from the internet and read over the choices so that they could select something that would be meaningful to them. I had a wide range of choices, poems like e.e. cummings, i carry your heart, to You're A Grand Old Flag and Amazing Grace. I chose children's songs and poems that I liked....I asked the music teacher if she had any lyric sheets, so that I could use songs they sing in music, but she didn't have anything like that.


So I ended up putting a few easy songs like Twinkle Twinkle Little Star so that they would have some variety. Ideally, this would be a fun project to collaborate with a music teacher or even a classroom teacher...many of my students wanted to write their own poems, but since this was just a one-week project, they didn't really have time to do that.

For my demo, I kept adding to one painting, and showed how to splatter paint
This project could be done in one week, I just wanted them to have a sneak peek at the list.

On painting day, did a demo of how to paint lettering. Since they weren't tracing over something that was already written out, this was really, really good practice for precision painting. I encouraged them to go slow, pay attention to the words and the spelling, and make sure they consider what they will do if they get to the end of the paper, but not the end of the word. I also pointed out that if they mess up, do not put an 'X' over the mistake or try to 'black' it out. Just keep going....the main idea is to have a bunch of words painted on a big paper.


I gave them all the list again and had them make their final choice. Once they had selected, they grabbed a 16X20 piece of paper, I did it on craft brown, but anything would work. It was important that they wrote their names on the back, and then I let them start painting.

This project worked really well with 3rd, and 4th graders. If the table was too crowded, I let some of them sit on the floor.  I tried the project with a class of 2nd grade, and since it was the beginning of the year, it was really hard for them to get the sizing of the letters right...they either did them too big or too little, or tried to black out their mistakes.


As a variation, I did allow one class to add melted wax to a smaller version of the painting, on white watercolor paper. I had a bunch of peeled crayons, I threw them in my wax melter, for encaustic painting, and let my students use the eye dropper and sticks to splatter the paintings with wax.


It didn't work out very well....the wax crumbles off the finished product easily...and the colors got all muddy after they got mixed by 20+ kiddos in one hour.


For the large paintings, I matted a few and hung them up at a local shop in town for the September art walk. It was exciting for my students, the paintings were very meaningful right after September 11th, and it was a great opportunity to show off such a large format.


It was super cool to see my students at the art walk with their families!! Some had never even been to a Third Thursday event.

Friday, January 21, 2011

Camera Still Life

 Resources to Consider
Camera images, I created a folder on my desktop full of images and I created a sideshow that I showed on my Smart Board. 
Visuals of cameras, still life images and examples of contour line drawings
Artist, Georgia O'keeffe (Any artist that draws or paints ordinary objects would be great, we just happened to be studying her work right before so it was a good way to tie together two units.)

Intended Grade Level(s): 3rd-6th
Estimated Class Period(s):4-6
Materials Required: Old/vintage cameras, one for each table or more, pencils, sharpies, white drawing paper, paint, brushes, water
Goals and Objectives: The goals of this lesson are technique and procedure based.
GLEs Accomplished In Lesson:  3rd Grade PP 1. B Paint lines and fill in shapes with even color using tempera (this is the main GLE I focused on for week 2-3).
 
Procedure (Guided Lesson, Instructions, etc):
Have a classroom discussion about still life. Demonstrate how to do a contour line drawing.
Project (Steps, Examples, etc):
1.    
1.    Explain that today we will focus on some basic drawing skills. The best way to become better at drawing is to practice. Today we will do some basic drawing exercises.
2.    Show examples of contour line drawing and also figure drawing using ovals and circles. Explain what a blind contour means.
3.    Explain that for the first few minutes, we will just get warmed up. Each drawing that we will do today will be timed. You will have 30 seconds, 1 minute or sometimes a bit longer to draw the subject matter.
4.    Have students draw a variety of cameras on pieces of paper, they can keep using the same piece, flip it over or they can get a new piece. Have them start drawing in pencil but try to discourage them from erasing, it takes way too long. Have them keep drawing for the entire time, they could add value or detail or pattern to their sketch. I explained that students should focus on one part of the camera, draw a box and completely fill it with one tiny bit of the camera, utilizing the corners, making it much larger in order to show variety and created an interesting composition, similar to the way O'keeffe would paint close ups of flowers, instead of just painting a flower in a vase.
5.    Students should draw for at least 30 minutes doing these basic drawing exercises.
6.    Discussion: Have students select their 3 best drawings. What do they like about the drawing?  Have them critique each others drawings.

Week 2. Students had to go back to their basic drawing sketches from week 1 and select a sketch to draw big on a piece of paper.

After they drew the camera, students outlined and added contrast in sharpie marker

They also had to 'draw' with yellow paint on a 12X18 piece of paper. This is a practice 'drawing/painting' for their larger camera still life painting next week. (I don't have images of this step)


All drawn by 4th grade.


Week 3: Students looked back at their 'practice painting' from week 1. Since they had practiced 'drawing' the outline in paint, it was much easier for them to get the shape of the camera right on the big paper.
The paintings below are all over 22" X 28"....I am not sure of the exact measurements.

We had to spread out on the floor to have room for this part. Students painted a large yellow outline on this HUGE paper. After painting the basic outline in yellow, students used florescent tempera paint to fill in the shapes. I had 1 brush in each color so that we didn't have to worry about spilling water buckets. I had 6 sets of colors sitting around the room on the floor for students to use.


Week 4: After the paint dried, I had some students go back with a black sharpie to add some outlines. These paintings looked very beautiful in the hall.


The week after finishing the project I hung up all the art in the hallways. It was right before spring break. I will never forget it, I came down with a really bad case of strep throat two days before our week off. It was miserable. When I came in to school a week and a half later, I found that the windows had been bricked-over during spring break in order to add some new classrooms to our school. Instead of a well-lit hallway, it was very dark and depressing and they didn't paint over the exposed gray bricks for almost 6 months, well after I had taken down the camera paintings.