Resources to Consider
Book, I’m the Best Artist in the Ocean by: Kevin Sherry
Book, I’m the Biggest Thing in the Ocean by Kevin Sherry
(I know I saw a version of this on a blog...I will post the link here if someone leaves it in the comments, I just can't seem to find the original post!)
(I know I saw a version of this on a blog...I will post the link here if someone leaves it in the comments, I just can't seem to find the original post!)
Intended Grade Level(s): 1st-2nd
Estimated Class Period(s): 2
Materials Required: Turquoise12X18paper, pencils, thin brushes for black and white paint (wk1) color diffusing paper 12X18, liquid watercolors, water, salt, brushes, scissors, glue
Goals & Objectives: The goals of this lesson are technique and procedure based.
GLEs Accomplished In Lesson: 1st Grade PP 1.A Apply paint in a pushing not dragging motion
PP 3.B Design wearable art: (optional: create a mustache to wear)
3.G Create an original artwork that communicates ideas about the following themes:
Animals/wild
EP: 1.A Identify and use lines: straight, curved 1.F Identify and use value: black and white 2.A Identify and demonstrate the concept of middle or center
2nd Grade PP 1.B Paint lines with control of the brush, clean paint brush before changing colors, mix two colors to create a third color 3.G Create an artwork that communicates ideas about
themes: nature
EP 1.A Identify and use wavy lines
1.F Identify and use light and dark values
Procedure (Guided Lesson, Instructions, etc):
Read the book, Best Artist in the Ocean, demonstrate the project in steps.
Project (Steps, Examples, etc):
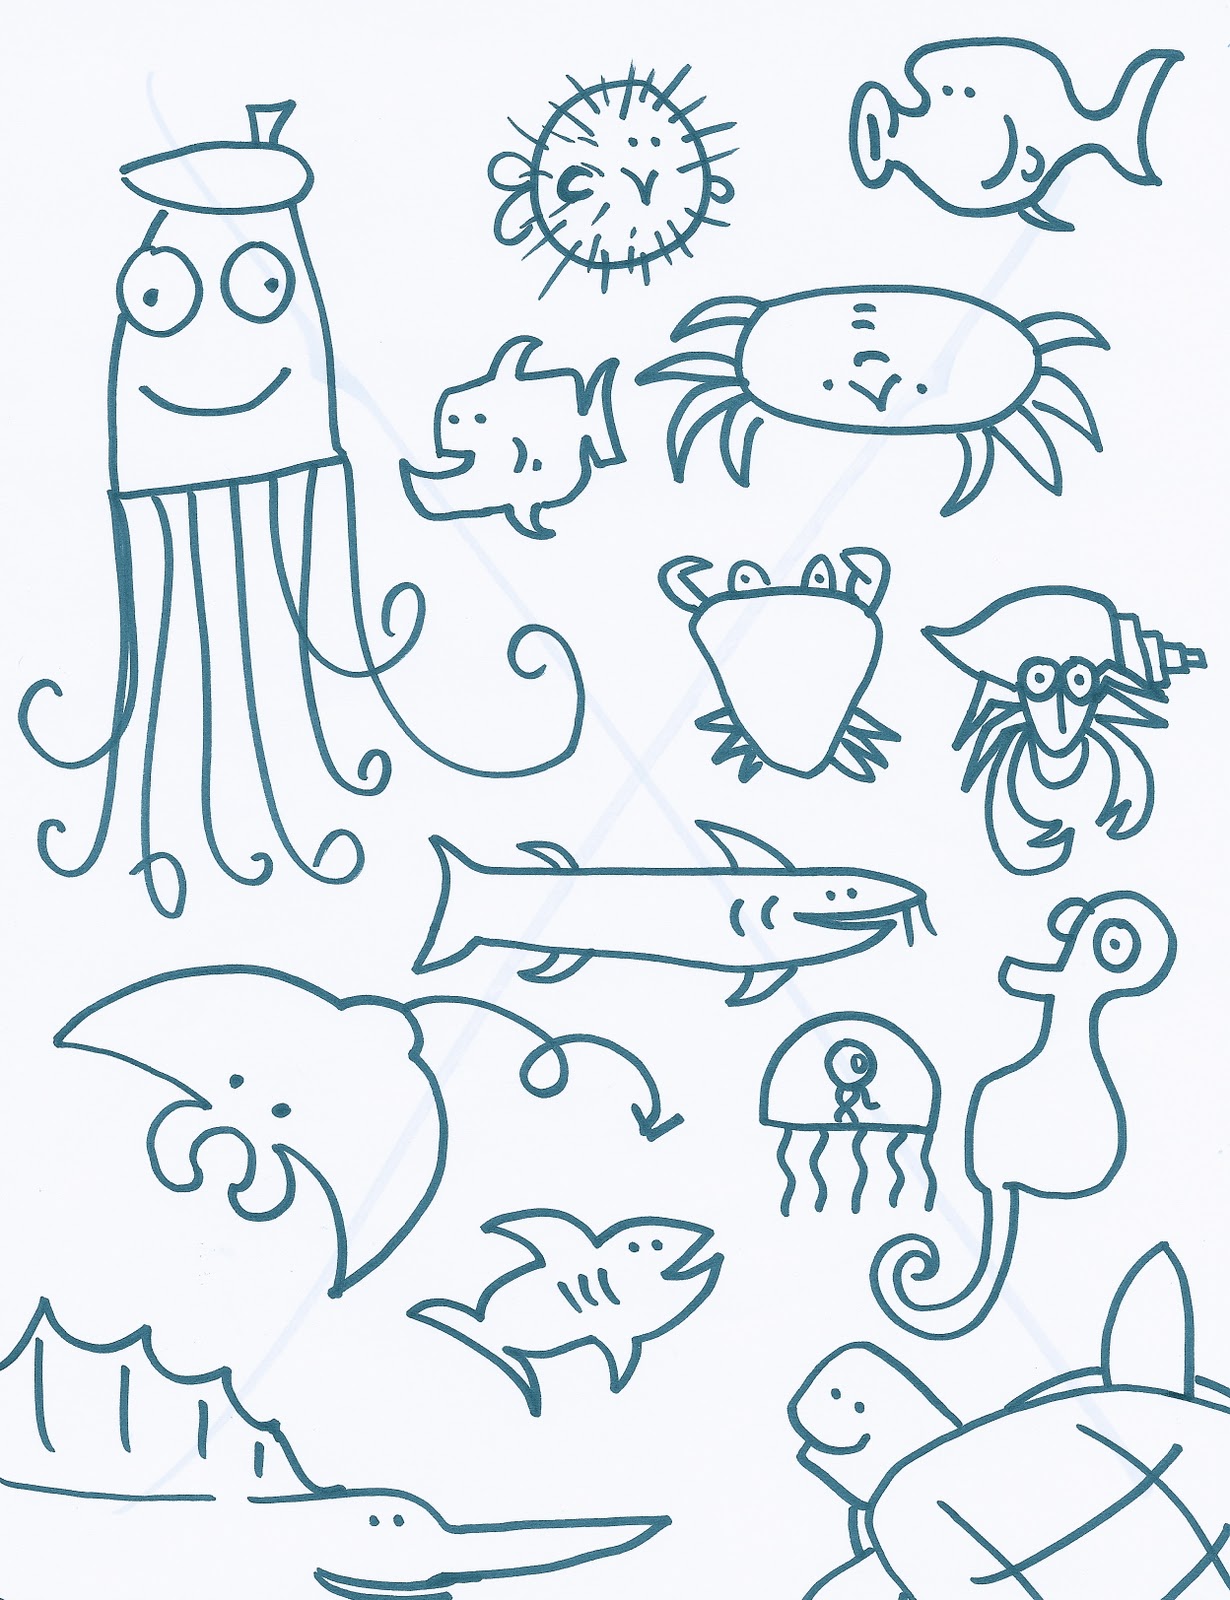
1. Demonstrate how to draw the giant squid on the board. I demonstrated an easy way and a hard way. Easy way : two big round eyes, pointy top, lines coming down below the eyes, close the shape up with a straight line, make ‘j’ and backwards ‘j’ lines for the tentacles. Hard way: two big round eyes, pointy top, lines coming down below eyes but instead of closing the shape, make the tentacles flow down into curled tubes, also, add a ‘Pac man’ mouth. Students chose which way they wanted, some combined both ways. I demonstrated how to draw a mustache (leaf shape) and suggested that they could add a black artist’s beret, chubby paintbrush in the giant squid’s tentacle, and students went on to add teeth, hair, a bow, glasses, eyelashes, a tiny drum set etc.
2. After drawing I demonstrated how to paint the WHITE of the eyes first. THEN do the BLACK outline with a tiny brush. I try to make sure that they do the black spot in the eyes LAST otherwise the eyes start to look like grey pools….if the white dries for a few minutes, it minimizes the chances of ruining the eyes.
3. When students finish, they can look at books, or color the attached sheet…I looked back through all of the little cute drawings by the giant squid and made my own handout for them. I also suggested that they look off of it and draw their own ‘squid’ things on a free sheet.


Day 2
1. Demonstrate how to paint the background. I used color diffusing paper, liquid watercolors in blue, turquoise, green and purple and some salt to make fantastically colored background papers. I had the kids put a 12X18 piece of white paper under their work so that when the diffusing paper bled through it would magically create a ‘copy’…I explained that they shouldn’t peak at the copy or else it would mess up their real painting (I had messed up one that was really white because I accidentally peaked at my under sheet). I put a little cup of salt on each table and showed the kids how to make psychedelic looking water by sprinkling the salt on a big puddle of paint and water. Once it tries, they look awesome!
2. Finally, after painting the water, students should cut out the giant squid painting from the week before and glue it down on the paper, put all 3 papers in the drying rack.
3. I am including a cute ‘mustache’ handout that you could use on week two since they will have scissors out already, it would be simple to cut out a mustache so that everyone in the room can be the BEST artist in the school!
4. Assessment and Reflection: Students will design a giant squid collage based on a teacher created rubric as it aligns with district objectives and goals. Students should be able to complete the drawing and painting with little or no teacher assistance and the finished product should have good craftsman ship and details appropriate to the grade level.
Sample Photos (If Available):

 The salt makes a really cool effect on the color diffusing paper with the liquid watercolors!

Feel free to print these and use them yourself, they are perfect for 'free time' activities on week 1 and 2.