Monday, September 27, 2010

Best Artist in The Ocean: Giant Squid painting


 Resources to Consider
Book, I’m the Best Artist in the Ocean by: Kevin Sherry
Book, I’m the Biggest Thing in the Ocean by Kevin Sherry

(I know I saw a version of this on a blog...I will post the link here if someone leaves it in the comments, I just can't seem to find the original post!)
Intended Grade Level(s): 1st-2nd
Estimated Class Period(s): 2
Materials Required: Turquoise12X18paper, pencils, thin brushes for black and white paint (wk1) color diffusing paper 12X18, liquid watercolors, water, salt, brushes, scissors, glue
Goals & Objectives: The goals of this lesson are technique and procedure based.
GLEs Accomplished In Lesson:  1st Grade PP 1.A Apply paint in a pushing not dragging motion
PP 3.B Design wearable art: (optional: create a mustache to wear)
3.G Create an original artwork that communicates ideas about the following themes:
 Animals/wild
EP: 1.A Identify and use lines: straight, curved 1.F Identify and use value: black and white 2.A Identify and demonstrate the concept of middle or center
2nd  Grade PP 1.B Paint lines with control of the brush, clean paint brush before changing colors, mix two colors to create a third color 3.G Create an artwork that communicates ideas about
themes: nature
EP 1.A Identify and use wavy lines
1.F Identify and use light and dark values

Procedure (Guided Lesson, Instructions, etc):
Read the book, Best Artist in the Ocean, demonstrate the project in steps. 
Project (Steps, Examples, etc):
1.    Demonstrate how to draw the giant squid on the board. I demonstrated an easy way and a hard way. Easy way : two big round eyes, pointy top, lines coming down below the eyes, close the shape up with a straight line, make ‘j’ and backwards ‘j’ lines for the tentacles. Hard way: two big round eyes, pointy top, lines coming down below eyes but instead of closing the shape, make the tentacles flow down into curled tubes, also, add a ‘Pac man’ mouth. Students chose which way they wanted, some combined both ways. I demonstrated how to draw a mustache (leaf shape) and suggested that they could add a black artist’s beret, chubby paintbrush in the giant squid’s tentacle, and students went on to add teeth, hair, a bow, glasses, eyelashes, a tiny drum set etc.
2.    After drawing I demonstrated how to paint the WHITE of the eyes first. THEN do the BLACK outline with a tiny brush. I try to make sure that they do the black spot in the eyes LAST otherwise the eyes start to look like grey pools….if the white dries for a few minutes, it minimizes the chances of ruining the eyes.
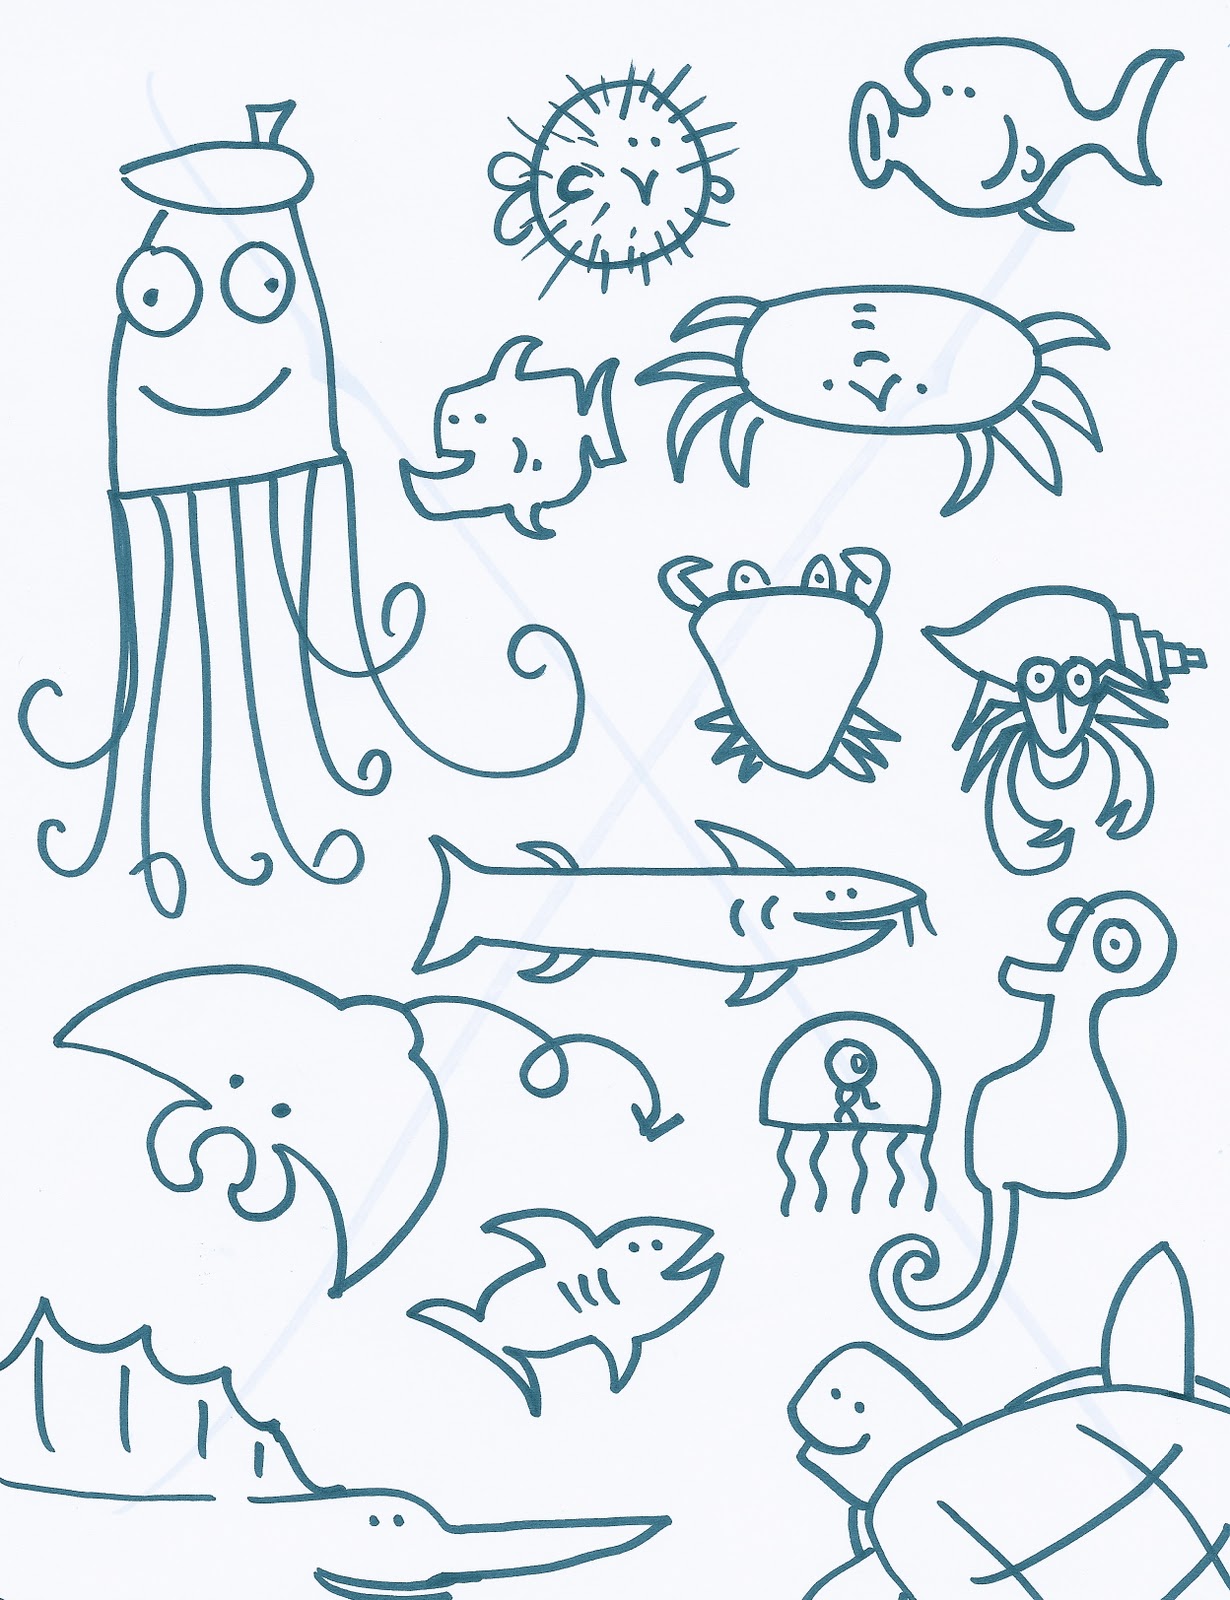
3.    When students finish, they can look at books, or color the attached sheet…I looked back through all of the little cute drawings by the giant squid and made my own handout for them. I also suggested that they look off of it and draw their own ‘squid’ things on a free sheet.
 (The third painting shows what can happen when the student uses too much black on top of really wet white paint)


Day 2
1.     Demonstrate how to paint the background. I used color diffusing paper, liquid watercolors in blue, turquoise, green and purple and some salt to make fantastically colored background papers. I had the kids put a 12X18 piece of white paper under their work so that when the diffusing paper bled through it would magically create a ‘copy’…I explained that they shouldn’t peak at the copy or else it would mess up their real painting (I had messed up one that was really white because I accidentally peaked at my under sheet). I put a little cup of salt on each table and showed the kids how to make psychedelic looking water by sprinkling the salt on a big puddle of paint and water. Once it tries, they look awesome!
2.     Finally, after painting the water, students should cut out the giant squid painting from the week before and glue it down on the paper, put all 3 papers in the drying rack.
3.     I am including a cute ‘mustache’ handout that you could use on week two since they will have scissors out already, it would be simple to cut out a mustache so that everyone in the room can be the BEST artist in the school!
4.    Assessment and Reflection: Students will design a giant squid collage based on a teacher created rubric as it aligns with district objectives and goals. Students should be able to complete the drawing and painting with little or no teacher assistance and the finished product should have good craftsman ship and details appropriate to the grade level.
Sample Photos (If Available):   

 The salt makes a really cool effect on the color diffusing paper with the liquid watercolors!
Feel free to print these and use them yourself, they are perfect for 'free time' activities on week 1 and 2.

Monday, January 11, 2010

Santa Owl Collage

Resources to consider: Paper Craft Magazine Santa Owl Pattern
Intended Grade Level(s): K-1
Estimated Class Period(s): 2 (for K, the second week only takes a couple of minutes at the end)
Materials Required:
12X18 Dark Green Construction Paper
9X12 Turquoise or Lime Green Construction Paper
9X12 Brown Construction Paper (for body and use scraps for wings)
9X12 Red Construction paper (for Santa Hat)
6X9 Tan construction paper (for belly)
2X12 White Construction paper (for white hat brim)
Circles 1 each: orange, brown and white (For eyelids and feet)
Brown crayon
Black crayon
Green Crayon
Pre-cut triangle beak
Pre-cut heart (punch, optional)
Cotton ball (for santa’s hat)
Red Glitter (optional)
Scissors, glue, pencils
1st grade Modifications:
9X3 brown Construction paper (for feathers under hat)
(2) 2X9 Lime green (or other green) construction paper (for scarf)

Goals & Objectives: The goal of this lesson is to use scissors and glue with control when creating an owl collage. CA 2.C Describe an artwork using art vocabulary: collage—a picture made by gluing shapes together.
GLEs Accomplished In Lesson:
Kindergarten PP 2.A Use scissors with control. EP 1.A Identify and use lines. 1.B Identify and use shapes. 1.B Categorize shapes as large or small. EP 1.E Use color.

Project (Steps, Examples, etc):

1. Write the word collage on the board. A collage is made by cutting and gluing shapes to make a design. We have made several collages this year. Have students describe other collages we have made. Also, have them say ‘collage’ out loud. We will be creating a Christmas owl collage today. This will require that we go step-by-step together. So even if you are finished, do not say ‘I am done’ and expect that we will go on just because you are done….if you finish early, try to help others around you or pick up trash while you are waiting. In order to create our owl we will need the scissor tray, in the tray you will have scissors, a black crayon (this is for the eyes, you won’t need that right away) a green crayon, (it is also for later) and a brown crayon (you will need that for most of the drawing!
2. Step 1: Draw a rainbow line or a rectangular shape. Using your scissors cut it out. Save the scraps. Demonstrate how to cut out two wings, making sure that they don’t use tiny baby triangles because an owl needs big wings. Demonstrate how they can use their brown to add texture for feathers while they are waiting for others to finish.
3. Step 2: Using the tan piece of paper, draw a rainbow line and cut it out for the owl’s belly. Add speckles (sort of looks like a cookie…maybe I will name my owl Chocolate Chip, or cookie!) I know you don’t have glue yet, but I will pass it out soon, we have a few more steps first!
4. Step 3: 3 circles….cute each one in half. Use orange for feet, brown and white are for eyes. Use the black to draw the eyes (At this point, I give 1st graders the option of adding dark brown feathers that would stick out under the hat)
5. Step 4: Pass out the blue or green construction paper for the owl to lay on, have students lay their owl so that it will be ready to glue. Also explain that once they get the glue, you will give them an orange beak that they will need to add. (I have 1st grade students make the scarf before they glue the beak on, first green strip: trim, second green strip, fold and fringe ends)
6. Step 5: After students have glued their owl onto the blue/green paper, have them make the Santa hat. Make a dot at the top in the middle and draw a line to each corner to create one large triangle. Have them cut it out and then pass out a white strip (might need to be trimmed if they make it super skinny), also pass out a cotton ball and a red heart.
7. Last step, glue everything to dark green construction paper and write name on the front. (First graders had time to add the glitter. 2 boxes of red glitter being passed around the room)

Week 2 Kindergarten Only: Review the collage information. At the end of today’s lesson, add the red glitter. Pass 2 boxes of glitter around the room. Remind them to draw lines or dots only, not big puddles. Allow students to take them home today.

Assessment and Reflection: Students will be assessed on their Santa owl collage based on craftsmanship and details appropriate to grade level.

Sample Photos:


Wednesday, December 9, 2009

Cloudy With a Chance of Meatballs

From this popular children's book, I was able to encourage a playful art atmosphere that resulted in a project with a lot of success.
Resources to Consider
Book by Judi Barrett Drawn by Ron Barrett
Inspiration source: Art Projects for Kids
Intended Grade Level(s): 1st-4th grade
Estimated Class Period(s): One (could be stretched to 2)
Materials Required
: White 9X12 tagboard or paper, rulers, sharpies, colored pencils (or crayons)
Procedure (Guided Lesson, Instructions, etc):
Read the book, Cloudy With a Chance of Meatballs, demonstrate how to draw grid, give examples and provide students with teacher support throughout the lesson.
Project (Steps, Examples, etc):
1. After reading the book Cloudy with a Chance of Meatballs, explain that students are to draw a grid on their paper using a ruler and a sharpie marker. In this case, I will ask students to first draw a border in pencil near the outside edge. If they mark the top line into thirds, they need to draw a vertical line down on their the left on the right mark.
2. Next they will look at the larger rectangle they made, and draw one horizontal line to divide it into thirds. The same is done for the narrower side, with a horizontal line drawn across it somewhere to mark off a third. What is left should be a grid with a large space, two medium, and one smaller square. More or less. It is, after all, still elementary school!


3. I show them in the book how some of the pages are divided into a variety of rectangles and artists will often attempt to tell a story this way.
4. Today students are to pretend that our town is the town of Chewandswallow. A food storm has just rolled into town. Have them save the first food that comes to their mind, don’t let them yell it out. Explain that they are going to draw that food really big in the largest box on their paper.
5. In the box above that, they are to draw a building or landmark from our town getting pulverized by the food. In the 3 boxes on the edge of the paper, they are to tell the story of what happened when the food storm hit. They should consider, is this a disaster? Is it totally awesome? The boxes should reflect their opinion of the situation.
6. Ideas for the boxes: Cover of local paper with the story on the front page, picture of themselves either holding a spoon or an umbrella, close up of another food or landmark or something related to the event. I showed an example of our local paper, pictures of a famous sculpture in our town and a local restaurant.
7. After drawing in sharpie and adding appropriate details and perhaps a background pattern in the big box, students should color with colored pencils.

Assessment and Reflection: . Students should be able to complete the drawing and painting with little or no teacher assistance and the finished product should have good craftsman ship and details appropriate to the grade level.


Sample Photos


Monday, November 23, 2009

Stained Glass Windows Kindergarten and 1st Grade

Resources to consider:
I showed them the stained glass window of St. George and the Dragon. My school has a couple of copies of the book by Margaret Hodges, Illustrated by Trina Schart Hyman. I had those in the room along with books about knights, princesses and castles.
Intended Grade Level(s): K-1
Estimated Class Period(s): 2
Materials Required: 12X12 white paper at least #80 weight, rulers, pencils, examples of stained glass and stained glass windows
Goals & Objectives: The goals of this lesson are to use a variety of colors and tempera paint with control, use shapes and lines in a composition.
Kindergarten PP 1.A Produce a line using crayon, pencil, or marker EP 1.A Identify and use lines 1.B Identify and use shapes I.E Identify and use color
1st Grade PP 1.B Apply paint with a dragging, not pushing motion EP 1.A Identify and use straight, curved, thick and thin lines 1.B Identify and use triangle, circle, square, rectangle and oval shapes 2.A Identify and demonstrate the concept of middle or center AP 2.A Identify the following in artworks: lines, shapes, colors, patterns
2nd Grade PP 1.B. Paint lines with control of the brush, Clean paint brush before changing colors EP 1.A. Identify and use zig-zag, dotted, and wavy lines 1.B. Identify and use geometric shapes EP 2.D identify and create a complex pattern
PP 3.G Create an original artwork that communicates ideas about the following themes: Nature, Places, countryside


Project (Steps, Examples, etc):

1. Introduce the unit with some examples of stained glass and some pictures of stained glass windows. Explain that stained glass is often used to tell a story in a church or other special building. It is also used in lampshades and candle holders. I showed them an example of a stained glass candle holder. (Tell the 2nd graders the story of St. George and the Dragon and point out books in the room, I actually had 2nd grade do a combination of k-1 lesson and the 3-4 lesson. One week they drew up a design for a stained glass window, the second week, they drew a simple line design and painted simple shapes, adding black tape to watercolor paper for the frame and the 3rd week, they painted the watercolor paper and added a black glue to the lines on the other painting. )
2. Tell my experience with stained glass and explain how the window we are painting will be very simple. Show them the project they can work on if they get finished early. This is a cornucopia. They will color it with markers.
3. Demonstrate how students will trace a ruler on their paper to make a design that looks similar to a simple stained glass window. I remind both K and 1st that rulers are not weapons or toys, they should not be used as drum sticks, they are for drawing or measuring only. Students will use a ruler to create shapes and write their name on the back of the paper. I had them do 3 with me and then they could add 3-4 on their own. Younger students may need to help each other hold the ruler in place on the paper so it doesn’t move while they are tracing it. Older students should use more lines and more complex patterns in their design.
4. After students have drawn the design and I have assisted the ones that need a little bit of help. MAKE SURE NAMES ARE ON BACK! I demonstrate how they will use tempera paint with BLACK only the first week. I also show how they will clean up. The entire painting will not be finished today, ONLY the BLACK lines. They will need a piece of newspaper on the table under their painting. This is the opposite of how a stained glass window is made. A craftsman or artisan would actually cut all the glass, lay it on a pattern and then solder it together. I also had them put a piece of news paper under their painting to make clean up little easier. I demonstrated how the paint drips and they will need to wipe it on the edge of the jar. Also, if one or two are at risk of painting the entire paper black, I mention that they are only painting lines, not filling in any shapes. After modeling the appropriate behavior, sometimes I review to make sure that they understand. At this point I have them put on paint shirts and I begin distributing paint to every table. I also remind them that some paint may get on their fingers and this is understandable, they can clean them at the end, but no ones hand should be completely black today.
5. Students will put their painting in the drying rack and clean up tables and hands when they are finished.
6. If a lot of time remains, students could color a picture of a cornucopia stained glass window using markers. (I hope to scan my drawing and upload it for you!)


Week 2
1. Review information about Stained glass windows from last week. I pointed out an example of solder, explaining that we are adding the 'colored glass' part now...the black is already in place, this is the opposite of how a real window would be put together, but an artist could use our design as inspiration for a real window.
2. Demonstrate how students will finish painting the shapes on their paper so that no white is showing. I stress that they should make sure to go back and touch up any spots that they accidentally leave white.
3. Demonstrate how they will paint between the black lines in the white spots paint being careful not to swoop their brush across wet spots. This can make a big mess out of their paper. I also demonstrate how the paint looks if the colors get mixed accidentally! Sometimes tempera paint looks bad when 2 colors mix. I show them what to do if the paint drips on their paper in a spot accidentally: they put a big dot of the correct color on top or leave it for next week and they can touch it up later. I also have silver (or gold) paint available for this project, it is very pretty! I hold up each color so that they can see it and I stress that it dribbles really bad if they don’t wipe their brush on edge of the jar.
4. At the very end, pass out black paint. They are to use the black as a final step, for touching up white spots or correcting paint that gets on black lines, ONLY. After students put pictures in the drying rack, they will have a little bit of time after clean up to look at books or to create a drawing on a free sheet. Also, have a St. George and the dragon stained glass window for them to color if they would like.


Assessment and Reflection: Students will design the Stained Glass Window painting based on a teacher created rubric as it aligns with district objectives and goals. Students should be able to complete the drawing and painting with little or no teacher assistance and the finished product should have good craftsmanship and details appropriate to the grade level.

Sample Photos (If Available):


Sunday, November 8, 2009

Sea Turtle Reverse Glass Painting


Resources to ConsiderLink (I showed some of these on my Smartboard): http://www.learnnc.org/lp/editions/drawturtle
http://www.wikihow.com/Draw-a-Sea-Turtle
http://drawsketch.about.com/library/bl-step-turtle.htm

Intended Grade Level(s): 2-4Grade

Estimated Class Period(s): 2

Materials Required: White 9X12 paper, Acetate, small paint brushes, pencils, sharpies, acrylic NEON paint, sea turtle pictures, ocean themed artwork examples, (optional: sea turtle tracers)

FYI: I used tempera paint for this initially, but it flaked off the acetate…I tried covering it with a layer of Modge Podge and that helped it to stay on…I am not sure if it is a permanent fix, acrylic works better on acetate so in the future that is what I will use.

Goals & Objectives: The goals of this lesson are technique and procedure based. (I did tie it in with a unit on ‘ocean’ art, but it could very easily adapt to other goals based on your district’s objectives.) The objectives include using organic shapes, using a variety of lines and complex patterns and filling in shapes using even color.

GLEs Accomplished In Lesson:
PP I.B Paint lines and fill in shapes with even color using tempera (see my note above about the type of paint)
AP 2.A Describe the use of the following in artworks: Outlines, Organic shapes, Organic forms, Positive and negative space, Contrast/ variety of values, Complex patterns

Procedure (Guided Lesson, Instructions, etc):
I set up the paint in those little round paint pallets, just a tiny bit of each color with one set of paints for each table. The students will only be using tiny amounts of paint and I found this to be less wasteful. Since it was using neon paint, I didn’t have them mix colors, but if you don’t have neon paint, color mixing could be part of the lesson goals.

Project (Steps, Examples, etc):

1. Demonstrate how to draw a sea turtle (I made sea turtle tracers….but a more advance group could have easily drawn the sea turtle without a tracer or with the help of an egg shaped/oval tracer) I suggest that they put it in the corner of the paper, rather than exactly in the middle, but I let students make the final compositional decisions.
2. After the outline is drawn demonstrate how to draw an oval on the inside of the shell and add lines all the way around to create smaller areas for the edge of the shell. Then add organic shapes in the middle.
3. Students will then lay their sheet of acetate over their drawing (I demonstrated this on my Elmo). They will use a sharpie to trace over the entire drawing so that it is now ‘traced’ onto the acetate. If you are worried the acetate will slide and shift, you can give them a small piece of tape to hold it in place. I did have a few students who were unable to line up their drawing after it had moved, but not everyone will need the tape.
4. Once they have drawn the outline in sharpie, demonstrate how to add a variety of lines, complex patterns and shapes inside their organic shape. Also, they should put small organic shapes on the flippers, neck and tail of the turtle so that it looks more like a reptile.
5. Have students flip their acetate over before they write their name in the corner or else it will be backwards.
6. Students will need to paint some of their tiny details today so that they will be dry by next week. Quickly demonstrate how they will use a tiny paintbrush with only 2 or 3 colors this week. Remind them that we are painting the back and this color will show through on the front even if they paint over it when it is dry. (If you don’t have time for this step it can be done at the beginning of the next lesson, just remind students to make sure the paint is dry before they paint over it!)
Day 2
1. Review the way that we painted last week. Demonstrate how they will paint right over the organic shape even if they painted the polka dots first, those will show through onto the front.
2. Make sure they paint the entire turtle.
3. Students can add patterns in the background with a sharpie, they could do tiny organic shapes, lines, or circles for bubbles. If time allows, students could also add paint to the background.

Assessment and Reflection: Students will design the Sea Turtle Reverse Glass Painting based on a teacher created rubric as it aligns with district objectives and goals. Students should be able to complete the drawing and painting with little or no teacher assistance and the finished product should have good craftsman ship and details appropriate to the grade level.

Here is the outline tracer I used...students still had to draw the shell, but this at least helped them to make it big enough.

Navajo Rug Paintings

All of the artwork was made by kindergarten students!


Resources to consider:
http://www.collectorsguide.com/fa/fa064.shtml Brief history of Navajo Weaving. I always ask the librarian to gather books for me to 'keep in the room as a reference. Also, I have included some photos at the end of actual Navajo Weavings that were taken at the Philbrook Tulsa Art Museum in 2007.
Intended Grade Level(s): K-2
Estimated Class Period(s): 3
Materials Required: 12X18 white paper at least #80 weight, triangle, diamond tracers, examples of blankets, woven designs, artifacts, information on Native American symbol and weavings, scissors, pencils, posters

Goals & Objectives: The goals of this lesson are to use a variety of colors and tempera paint with control, use shapes and lines in a composition. This lesson could easily be adapted to district objectives and cross curricular goals.
GLEs Accomplished In Lesson:
Kindergarten PP 1.A Produce a line using crayon, pencil, or marker EP 1.A Identify and use lines 1.B Identify and use shapes I.E Identify and use color
1st Grade PP 1.B Apply paint with a dragging, not pushing motion EP 1.A Identify and use straight, curved, thick and thin lines 1.B Identify and use triangle, circle, square, rectangle and oval shapes 2.A Identify and demonstrate the concept of middle or center AP 2.A Identify the following in artworks: lines, shapes, colors, patterns
2nd Grade PP 1.B. Paint lines with control of the brush, Clean paint brush before changing colors EP 1.A. Identify and use zig-zag, dotted, and wavy lines 1.B. Identify and use geometric shapes EP 2.D identify and create a complex pattern
AP 2.A. Explain how Native American art reflects the habitats, resources an daily lives of Woodland and
Plains Indians
Compare and contrast the habitats, resources and daily lives of Woodland and Plains Indians

Procedure (Guided Lesson, Instructions, etc):
FYI Second graders study Woodland and Plains Indians so if you do this unit at the same time that the classroom teachers are covering Native Americans, be specific that NAVAJO Indians are from the Southwest, they are the most famous for creating weavings, their culture is different than Native Americans that live other places. This could be a good time to compare and contrast the Navajo with the Woodland and/or Plains Indians
Project (Steps, Examples, etc):
WEEK 1
1. Introduce Native American culture. Show examples of Navajo weavings (review for 2nd grade or an introduction if they will be weaving paper soon). When I introduce the lesson, I provide information that refers what students are learning about in their regular ed. classroom. The main focus would be culture and symbols for 2nd grade and lines and shape for Kindergarten.
2. Demonstrate how students will trace shapes on their paper to make a design that looks similar to a Navajo Rug. Students will trace the shape in pencil and write their name on the back of the paper. Younger students may need to help each other hold the shape in place on the paper so it doesn’t move while they are tracing it. Older students should use more lines and more complex patterns in their design. I keep the kindergarten students to a very limited and structured design, diamond in the middle, triangles in the corners and lines in the middle.
3. After students have drawn their design and I have assisted the ones that need a little bit of help. I demonstrate how they will use temper paint with 2-3 colors only the first week. I also show how they will clean up. The entire painting will not be finished today, only 2-3 shapes/lines. I also demonstrate how the paint looks if the colors get mixed accidentally! Sometimes tempera paint looks bad when 2 colors mix (like blue and red doesn’t make a very pretty purple) I show them what to do if the paint drips on their paper in a spot accidentally: they put a big dot of the correct color on top or leave it for next week and they can touch it up later.
4. Students will put their painting in the drying rack.

Week 2
1. Review information about Native Americans from last week.
2. Demonstrate how students will finish painting the shapes on their paper so that no white is showing. I stress that they should make sure to go back and touch up any spots that they accidentally leave white. Demonstrate how they will paint over their original pencil lines with black paint being careful not to swoop their brush across wet spots. This can make a big mess out of their paper.
3. At the very end, pass out black paint. Students will carefully paint their (now invisible) pencil lines. (this step could even be saved for the 3rd week for younger students if you are worried about the black making a mess if it mixes with the other colors)
4. After students put picture in the drying rack, they will have a little bit of time after clean up to look at Native American books or to create a drawing on a free sheet. Remind them to be careful not to let colors mix.
Week 3 NOTE: THIS IS A 5 MINUTE STEP!!
1. After the painting is completely dry, before sending the artwork home or hanging it up for an art display, demonstrate how students will use scissors to snip the short ends of the paper so that their ‘rug’ looks more like it has been woven. Stress that they should only snip the short sides for fringe, do not cut anything else up!

Assessment and Reflection: Students will design the Navajo Rug Tempera Painting based on a teacher created rubric as it aligns with district objectives and goals. Students should be able to complete the drawing and painting with little or no teacher assistance and the finished product should have good craftsman ship and details appropriate to the grade level.

Here is an actual weaving on a loom:


Here is a Native American symbol plate, possibly a Thunderbird:
Here is some Navajo Pottery. It might be neat to follow the painting with a clay lesson and base the project around the black and white pottery designs:

Chalk Owl Painting


All of the examples below are from Kindergarten students. This project is very fun and I have done it two different ways...You can see the difference in the examples and I made a note in the procedures to explain the difference.


Intended Grade Level(s:
K-2
Estimated Class Period(s): 2

Materials Required: black 18X12 construction paper, colored chalk/chalk pastels in a tray of water, pencils, white tempera paint, circles to trace (depending on age level), books about owls, owl pictures

Goals & Objectives: The primary goal of this lesson is for the student to use lines and shapes.
GLEs Accomplished In Lesson:
Kindergarten
PP 3. G Create an original artwork that communicates ideas about the following themes: Outdoors (seasons, nature) EP1.A Identify and use lines 1.B Identify and use shapes, Categorize large and small 1.E Identify and use color
1st Grade
PP 1.A Fill an area with solid color/value using crayon, pencil, or marker
1.B Apply paint with a dragging, not pushing motion
EP 1.B Identify and use triangle, circle, square, rectangle and oval shapes
Categorize large and small and medium

2nd Grade
PP 3.G.Create an original artwork that communicates ideas about the following themes: Nature; Places (e.g., school, home, stores, neighborhood, countryside
EP 1.B. Identify and use geometric shapes


Procedure (Guided Lesson, Instructions, etc):
This lesson is part of a unit on shapes. For older students, you could read Owl Moon, Or the book Goodnight Owl, but I recommend using the owl poem. I drew it on a poster so I can act it out and have the students say it with me (make up actions):
The Owl
There’s a wide-eyed owl
With a pointed nose.

He has pointed ears
And claws for toes.

He sits in a tree
And looks at you.

Then he flaps his wings
And says, “Tu-whit, tu-whoo”

Project (Steps, Examples, etc):
1. Read the owl poem with students. I made a poster of it and we said it out loud a few times through, acting it out. Show pics of owls. Explain how all owls look different depending on where they live, they have to blend in to their environment…..Show a few pics from magazines or books. Explain how owls are fierce hunters and cute and cuddly, that is why they are my favorite animal…
2. Quickly review the things we have learned….lines, shapes and texture….draw a few things on the board, artists use lines and shapes all the time, we will be using these all year to create art. Give students a black 12X18 paper pre-folded the hot dog way. Explain that they will draw 4 things. A straight line, nearly to the top, but not all the way. A circle, an big oval and a triangle. Demonstrate this on the board….it makes a big B….show them a tiny way…they way NOT to draw it…..

NOTE: I Have done this lesson 2 ways...the way that I described above, they are using circle tracers for the big owl and then free-handing the little owls. Another way to do it is to have them fold their paper in half the tall skinny way, paint a capital 'b' with white paint and then fold the paper in half so that it makes a print, this creates one large owl on the paper...then they can go over it to make it more even, add ears and a tree branch at the bottom and stars and moon at the top...I prefer the 'printing way' a little better...

3. While students are drawing, have them put on paint shirts.
4. Demonstrate how to paint with white paint. Go over the rules for paint: don’t paint hands, paper only, be careful not to let paint drip, wipe it gently on the edge of jar…..don’t take paint jar out of the plastic tray, we will use more colors later, but today we are starting out with one color!….. Outline each shape, fill it in. Fold over gently, rub the back of the paper (one boy threw his on the ground and stomped on it….it did make a cool texture for feathers)……open it up and see a symmetrical owl…a giant one….demo how to add a tree branch, stamp the brush for leaves, add a full or crescent ‘c’ moon, and add a few small stars. Mention that they should be careful not to totally cover the paper with white paint…it will be a snow scene and the owl won’t show up….
5. Before passing out the paint, show them a few books that are marked with owl pics: Turtle Island ABC (from CTV) Brother Wolf (MTJ) and Goodnight Owl….Students can look at the books to get ideas on how they will color their owl the next week. Quickly show them the example for next week, 2 ways, the goodnight owl and others…..Demo how to clean up and put paper in drying wrack….
6. Pass out the paint, let students work…cleanup.


Week 2
1. Read and act out the owl poem with students again.
2. Demonstrate how they will use chalk pastels to color their night owl scene. All of the white shapes need to be colored over this week. This is a great way for them to add really cool texture and details. Demonstrate how to draw the eyes, on the board first, 2 or 3 ways….then the beak….an easy triangle or the harder owl beak…..demonstrate how to put that mask of feathers around the face and then add feathers for the wings and belly….While students are drawing in pencil, have them put on paint shirts and pass out paintings from last week.
3. (Since it is on black paper, the chalk doesn’t always show up right at first if it is wet, when they color directly on the black paper. I remind them not to let their paper get too wet, and not to rub too hard in one spot because this will make their paper get a whole in it. I show them how to do the owl’s eye! This is important or else it won’t look like an owl, I make them do the eye first, a little bit of gray/black in the middle with yellow or yellow green around the outside…make sure the babies match!) When everyone is finished drawing, demonsrate how to use chalk. Explain that students shouldn’t get hands dirty on purpose!! Show how to color eyes, explain to be careful not to get paper too wet or it could rip, explain why the chalk pastels are in water…..Demo how to color and outline things….demo how to use the side of the chalk to color big areas, how to color the moon, leaves, stars, and sky with purple.
4, Demonstrate how to color the tree, leaves, moon, and stars. Remind them that they do not have to color the sky since it is already black like night, but if they want to make it more spooky, they can put purple and blue around the background like a spooky haze. Explain that students will have to wash hands and put this in the drying rack when they are done and they can look at the mini-goodnight owl book or any book in the room.

Assessment and Reflection: The students will use chalk to color a night owl scene according to a teacher constructed rubric. Students should be able to use the white paint, the chalk, draw the shapes, and color essential parts of the composition with little or no teacher assistance.